


Roof Snow Removal 101
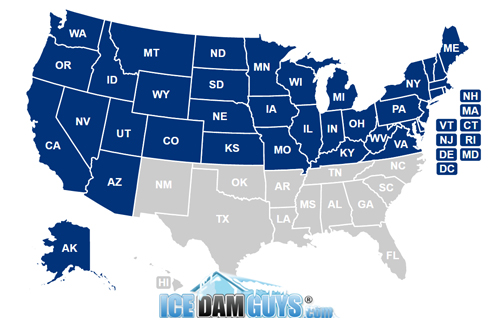
Call us at 1-800-423-3267 if you have an ice dam on your roof and live anywhere in the US, including in hard-hit Alaska. We are properly licensed, bonded, and insured, and are the top-rated ice dam removal company in the US. You can end the leaks with a phone call to Ice Dam Guys®.
Why do I need to get the snow removed from my roof?
The main reason you should keep your roof as snow-free as possible is that it’s crucial for preventing ice dams from forming on your roof.
Ice dams can’t form without snow. If you’re able to prevent ice dams, you’re far more likely to prevent your roof from leaking and damaging the inside of your home.
Another reason roof snow removal is so important is that it’s a good idea to keep all that excess weight off your roof. As a rule of thumb, one square-foot of snow that’s one-inch in depth weighs about a pound. If your roof has 12 inches of snow on it, that could easily amount to thousands of pounds of stress on your roof. That’s not even counting the weight of any ice dams that may form as a result of leaving the snow on your roof; just one cubic foot of ice weighs 57 pounds, and a typical ice dam can weigh thousands of pounds. Minimizing the stress placed on your roof is a great way to minimize the risk of leaking and cave-ins (the latter of which occur more frequently than you might think).
Do I have any good alternatives to roof snow removal?
In my experience, no.
The most commonly touted “alternative” to roof snow removal is heat cables. People with extra money to throw away sometimes use heat cables to try and prevent snow from piling up on their roofs (primarily on the overhangs and in the valleys). The trouble is that an array of hot cables typically isn’t enough to mitigate the effects of Mother Nature in the wintertime—or to do much more than melt little grooves in the snow after a major snowstorm. Very few people have long-term success with heat cables; if you’re one of them, consider yourself part of a lucky minority.
Heat cables are also prohibitively expensive to install and run. Because heat cables are a relatively specialized product, the installation costs alone are significant.
In addition, heat cables run on what’s called a dead-short circuit—meaning that the “positive” and “negative” wires are in constant contact with each other. As a result, the cables use a ton of electricity, and they frequently fail by shorting out.
Even if you can afford heat cables, you’re taking a gamble that they’ll actually keep your roof snow-free enough to prevent ice dams and leaking. We’ve removed countless ice dams entangled with hundreds of feet of heat cable—which was either broken, or which was working correctly but simply not preventing ice dams or keeping snow from piling up.
How do I know when roof snow removal is necessary?
A good rule of thumb is to get your roof cleared after every 6 inches of snowfall. If you prevent too much snow from piling up on your roof, it’s much harder for ice dams to form and you can certainly stop worrying about any sort of roof cave-in.
Of course, it all depends: I’ve seen ice dams form with only a dusting of snow on the roof. I’ve also seen roofs with mountains of snow remain free of ice dams.
Generally speaking, even though every roof is different, you’ll especially want to consider this “6-inch” rule of thumb if you’ve repeatedly had problems with ice dams in the past.
On the other hand, if you’ve never had an ice dam and your only concern is avoiding a roof collapse, then you might want to consider holding off on any roof snow removal until you’ve accumulated a foot or more of snow.
When deciding the right time to get roof snow removal, it’s also important to take into account how heavy the snow is. Wet, heavy snow can weigh 6 or more times as much as lighter dryer snow. One cubic foot of snow can typically range in weight from as little as 0.26lbs (light, dry snow) to as much as 1.66lbs. (heavy, wet snow). If you step outside and pick up the snow and it seems heavy and wet, that’s one factor that might indicate you should get your roof cleared sooner rather than later.
How often you need to get your roof cleared also depends partly on the weather forecast.
If 6 inches of snow falls on your roof but the nighttime and daytime low temperatures are forecast to stay above freezing for a couple of days, you probably don’t need to get the snow removed—because it will likely melt soon enough (or at least decrease significantly in weight) and never become an ice dam.
However, if 6 inches of snow falls one night and another 6 inches of snowfall is forecast for later in the week, or if the low temperatures remain below freezing, you may want to remove the snow ASAP. Or better yet, call a roof snow removal service right away and schedule your roof snow removal in advance – for shortly after the second storm is forecast to arrive. This way, you’ll get both snowfalls removed from your roof with one phone call, and you’ll be first in line during a particularly busy time for local roof snow removal companies.
How should the snow be removed—with a shovel or a roof rake?
Sometimes you need your roof snow removed by shoveling, other times by roof-raking. It depends largely on (a) how big your roof is and how tall your house is, (b) how much snow your roof received, and (c) whether the snow itself is powdery and light versus wet and heavy.
Roof-raking is generally best as an ongoing, winter-long task that you, the property owner, can perform as a way of keeping the snow off your roof.
If you live in a small one-story home, you can probably use a roof rake or roof snow broom to reach most or all of your roof and keep it snow-free by routinely raking the snow off. (Here’s a roof rake we recommend, and a roof-rake set we use and recommend.) If you live in a taller home, roof-raking is an excellent way to clear the overhangs. This can help relieve excess weight on the weakest part of your roof (the overhangs) as well as aid in ice dam prevention.
Of course, roof-raking has its limitations. Unless you live in a one-story home, it’s often hard to rake any higher than the overhangs, even if you buy extension rods for your rake. It’s also difficult to use a roof rake to clear the snow out of your roof valleys (because the rake is flat and the surface is angular). In addition, roof-raking often isn’t particularly effective at removing wet, heavy, or hardened snow from your roof.
As a snow-removal technique, shoveling picks up where roof-raking leaves off. Your roof probably needs to be shoveled (a) after a storm drops too much snow for you to remove with a rake, (b) if the snow is too heavy or hardened for your roof rake, or (c) if your roof is too large or tall for you to be able to rake it.
Shoveling is probably the better option for roof snow removal when there’s heavy lifting to be done, or when you want your roof completely cleared (so as to minimize the chances of a cave-in or the formation of ice dams).
What do I need to know in case I want to rake the snow off my roof?
The first thing to know about roof-raking is it’s simply one tool in your wintertime home-protection toolbox. That is, it’s an excellent habit to be in, but even if you rake your roof religiously, there may still be occasions when you need to hire a roof snow removal service with shovels, or an ice dam removal service with steamers. A good roof-raking regimen can minimize the occasions when you need these services, but it probably won’t eliminate them.
The first part of effective roof-raking is having the right roof rake. Most importantly, your roof rake should have small rollers or bumpers on the bottom of the blade, so that it doesn’t come into direct contact with the surface of your roof (i.e., the shingles) and unnecessarily scrape them. If you’re unable to find a roof rake with rollers or bumpers, then try to get one with a plastic blade (rather than a metal one).
I also suggest, if possible, buying a rake with a slight curve in the handle, near the head of the rake. The short top section of the pole is curved so that you get a better angle, allowing the rake to cut deeper into the snow—down to the surface of the roof —as you pull the rake down the slope. It also helps rake deeper snow by keeping the pole a bit higher off your roof deck instead of dragging on the blanket of snow atop your roof. Because the curve keeps the extension poles a bit higher off your roof, it also helps you reach the higher-up areas of your roof. Without this curve your pole prematurely drags on the very edge of your roof (along the overhangs), shortening the reach of your rake.
When you buy your rake, it’s also a good idea to buy extra extension poles so that (a) you can rake as high-up as possible on your roof, and so that (b) in case one of your original poles gets damaged or bent (and it most likely will) you can replace it and not end up high-and-dry because the hardware store no longer has your roof rake in-stock. It is extremely common for most retailers to switch the brand of roof rakes they carry—even midseason.
Once you have your roof rake, priority #1 is using it to clear the snow off your overhangs—which are the areas most prone to ice-dam formation. Even if you clear the snow off of no other areas of your roof, make sure to clear the overhangs.
As I mentioned before, the valleys can be tough to rake, but if you can remove snow from them without damaging your shingles or hurting yourself, by all means do so. To the extent that you can reach other areas of your roof with your rake, raking those areas as well can also help prevent ice dams. The more snow you can clear from your roof, the less your chances of dealing with a cave-in or ice dams will be.
The easiest and most efficient technique for raking is to start clearing the overhangs first and work your way to the top, pulling off a foot or so of snow at a time (although depending on the depth and weight of the snow you may be able to pull much more than a foot at a time). If you start raking too high-up on the roof and try to pull off too much snow at once, on your way down the roof the rake head will begin to float and loose contact with the surface of the roof. This is bad because you’ll end up packing down any snow that’s left behind, making it more difficult to remove on subsequent passes. You will also gradually be building a pile of snow along the overhangs, which will prevent your rake from being able to reach higher, and which you’ll need to remove at some point anyway.
So, in terms of technique, all you have to remember is: start at the bottom of the roof and work your way to the top, and don’t try to pull off too much snow at once.
By the way, be EXTREMELY careful to avoid hitting any overhead power lines when raking your roof. Overhead power lines are common among older homes (and even a few newer homes). You’re waving a giant metal pole in the air. Metal poles and power lines don’t mix. Unless you really want to get toasty-warm next time you rake your roof, just be aware of your surroundings and be careful where you put your rake. In all seriousness, be extra careful of overhead power lines, they could kill you.
If you need to or simply want to hire a roof snow removal service to rake your roof, expect them to charge the same rates that they would for shoveling your roof—usually $95-175 / hour.
What should I know in case I need to get my roof shoveled?
The first thing to know about getting your roof shoveled is that it’s most likely NOT a good idea to try to do it yourself. You can easily injure (or kill) yourself trying to climb onto your slippery roof. Because I’m not encouraging you in any way to climb up on your roof and shovel the snow yourself, I’m not going to discuss the use of a safety harness, ropes, etc. These are tools that can often cause more harm than good when not in the hands of a professional. My advice is to stay off of your roof and/or ladders whenever possible.
However, if you’re absolutely determined to shovel your roof yourself, here are a few pointers for how to do it safely and effectively:
Use a shovel with a plastic edge, not a metal one. The plastic is less likely to damage your shingles.
Don’t shovel your roof too frequently. Every time you run a shovel across your roof, you remove a few of the tiny granules from your shingles. Those tiny granules are what protect your shingles from UV light, and they also add fire-resistance to your roof. Wearing them down is like rubbing your hands together until you rub the first layer of skin off and you’re left with only 6 delicate layers of skin on your hands (ouch!). It doesn’t matter how delicate you are, or whether you use a shovel with a plastic edge (which you should): every time you shovel, you rub off some granules. It’s fine to shovel a few times every year, but don’t do it dozens of times a year. Moderation is best.
Don’t leave pathways in the snow. Every time you step on snow, you hard-pack it onto your roof. Left alone, these footprint pathways can become ice, and can often form ice dams. Make sure that any snow removers or ice dam removers who get on your roof don’t leave behind a goat path of footprints; make sure they’re removed. Inexperienced ice dam removers make this mistake all the time.
Don’t dump the snow onto your gas meter. Your gas meter has a little breather hole that, if covered up, will cause your gas to shut off and subsequently shut off the furnace that heats your home. Just don’t dump snow onto it.
Snow-removal services generally charge $95-175 / hour for shoveling (typically the same rate as for roof-raking). Of course, that rate can vary. It depends on demand, for one thing; snow removal typically costs more when everyone’s home is blanketed by a blizzard. Many companies offer cheaper rates, but in most cases that’s because they’re not properly insured, or because they’re bidding for the cheapest workers (who may or may not have any experience working on roofs). Be very wary of roof snow removal services that seem like a “steal.”
By the way, if you’re getting the snow on your roof shoveled (or raked, for that matter) by an ice dam removal service you hired to remove your ice dam, their typical hourly rates for ice dam removal will probably apply to the snow removal as well.
Why? Because ice dams are almost always covered by a thick blanket of snow, which must be removed before any ice dams can be removed. If an ice dam removal service spends 3 hours (for example) to complete a job, it’s fairly common for 60-90 minutes of it to be spent on roof snow removal—for which the company’s ice dam removal (not snow removal) rates would apply.
This is common practice simply because the ice dam removal service’s equipment and skilled technicians are “tied up” for as long as they’re at a given property—regardless of whether they’re removing the snow or removing the ice dams. In most cases, some amount of roof snow removal is just part of the job when locating and removing an ice dam. To the extent you’d like to save money (and spend a little time in the fresh winter air), you may want to try and roof-rake as much of the snow off your roof as possible before the ice dam removal service shows up. That way the ice dam removal technician will be able to spend more time steaming your ice dams and less time having to shovel snow off your roof.
How about a recap?
Let’s sum it all up with a few “do’s and don’ts” of roof snow removal:
Do get the snow removed either by shovel or by rake, so as to minimize your risk of a cave-in and/or ice dams.
Don’t put any salt products on your roof—unless you want to run the risk of discolored shingles and dead plants or grass.
Don’t use heat cables unless you are prepared for significant costs, and the high probability that they just won’t work or will go bad within a year or two after installation.
Do try, as a rule of thumb, to get your roof raked after every 6 inches or so of snowfall, so that it never piles up too much. If your main goal is to prevent ice dams, you should clear your roof after about every 6’’ of snowfall. But if your main concern is a roof collapse, then raking your roof after every 12’’ or more of snowfall should be adequate.
Do rake your roof as routinely as possible—preferably with a rake that has rollers or bumpers on the blade that keep the blade from directly touching your shingles (a plastic or poly-edged rake will also do).
Do be careful to avoid any overhead power lines when raking your roof.
Do make sure you clear the overhangs—preferably first—whenever you rake your roof.
Don’t try to shovel your roof snow yourself. If there’s simply too much snow or if the snow is too hardened or heavy for your roof rake to handle, hire a roof snow removal service instead.
Don’t use a shovel with a metal edge or shovel your entire roof more than a handful of times each winter, if you insist on shoveling your roof yourself (which I don’t suggest).
Don’t leave any snow pathways on your roof—caused by walking back and fourth through the snow. Don’t allow a roof snow removal or ice dam removal service to do so, either. Unless these snow pathways are removed, they’ll almost certainly become ice, and quite possibly ice dams.
Do be very wary of any roof snow removal companies whose rates are surprisingly low; the cheapest services are almost always using non-insured, under-qualified, under-experienced workers.
Do realize that ice dam removal companies generally apply their rates for ice dam removal to snow-shoveling, when snow shoveling is done in conjunction with ice dam removal. Remember, there is almost always some amount of roof snow removal that needs to be completed when removing ice dams.