Ice and Water Shield: Great Way to Minimize Roof Leaks from Ice Dams
What is ice and water shield?
If you plan to have your roof replaced within the next year or so you should probably research “ice & water shield.” Ice and water shield is a thin rubberized asphalt membrane that goes beneath the shingles of your roof – typically only along the overhangs and in the valleys. It can protect your home from water leaks caused by ice dams and wind-driven rain. You should seriously consider using ice & water shield if you live in ice dam country. In Minnesota it’s actually mandated by building code that you have a certain amount of it.
What does ice and water shield look like?
Ice and water shield looks like a long sheet of sticky black plastic. It’s available in several different brands, including Grace, WeatherLock, Weather Watch, Moisture Guard Plus, and more. Grace Ice & Water Shield is the only brand that we would recommend you use. In our opinion you should ask for it by name. And no, we don’t have any affiliation with Grace.
Ice & water shield is also known as ice barrier, ice protection, ice dam membrane, and ice dam protection. It’s like the Prince of the roofing world (maybe it also has a symbol).
Is ice and water shield required by code?
We don’t know the regulations in all states, but Minnesota building codes require roofers to install ice & water shield beginning at the edge of the overhang (i.e., the drip edge) and ending at least 2-feet inside the nearest interior wall. Because most ice & water shield comes in rolls 3 feet wide, one pass typically isn’t quite enough to cover the distance between the drip edge and 2 feet past the interior wall on most homes. That’s why the vast majority of roofs end up with a 6-foot swath of ice & water shield along their overhangs. But a real overachieving roofer will make a third pass, giving you a total of 9 feet of ice & water coverage.
Where on the roof is ice and water shield installed?
In addition to installing it along the edge of the overhangs (about 6-9 feet up the roof), a good roofer will almost always put ice & water shield in the valleys of your roof, and in some cases it should be installed along the eaves as well. Although most roofers don’t know or bother to do it, a great roofer will install ice & water shield around skylights, chimneys, plumbing, heat vents, and ventilation caps – anything that penetrates the roof deck. He’ll put the material on whatever he’s trying to seal, and will cut it at corners or curves in a way that creates a leak-proof barrier. Traditional flashing (aluminum or galvanized steel) will then cover this “sub-flashing” made from the ice & water shield.
As a longtime ice dam removal pro, I’d also recommend that ice & water shield be installed on any shallow portions of a roof that have less than a 4:12 pitch. Those less-steep parts are more likely to collect snow and ice, and it’s easier for water to pool up if an ice dam forms.
As mentioned above, an “overachieving” roofer might go the extra mile and install even more ice & water shielding. Be sure to ask each roofer you’re considering, how much ice & water shielding he installs. If the company installs more than the bare minimum (i.e. 24-inches past the nearest interior wall) you’re probably dealing with a solid roofer. But even a solid roofer may not know how best to leak-proof a home in ice dam country. A general rule is that more ice & water shield is better than less.
Here’s a good breakdown on the code from the city of Golden Valley, Minnesota. It includes plenty of pictures, which can help you understand exactly what should happen when the roofer gets to work.
If you’d rather watch a video, here’s a good one from “Ask the Builder”:
(Quick recap: The video shows you exactly what ice & water shield looks like and where it’s installed. In the video, it’s been installed on the entire roof. The guy also talks about how the ice & water shield seals itself around roofing nails, which helps to distinguish it from a traditional underlayment product (e.g. tar paper, roofing felt, thermoplastic polyolefin, etc.), or cheaper inferior brands of ice & water shield that also don’t do nearly as good of job at sealing around nails.
Should you get ice and water shield installed?
You can (and should, in my opinion) insist on installing ice & water shielding throughout your entire roof, especially if you know your home is prone to ice dam leaks. Just be prepared for push-back from your roofer. Many roofers don’t like to install ice & water shielding on the entire roof because it can make the roof more difficult to tear off later if and when you need a new roof. As a roofer, there’s nothing worse than discovering the roof you’re tearing off (and have already provided a quote for) is covered from head to toe with ice and water shield. Roofers are a band of brothers that stick together, so it’s common practice to discourage a homeowner from covering their entire roof with ice & water shield. But…If you’re willing to make the financial investment, don’t let a roofer sway your decision. Take them to the mats over it if you must.
Cons of installing ice and water shield on your roof
The only real negatives of covering your entire roof with ice & water shield are (1) cost and (2) potential ventilation problems (which are very rare). Ice & water shield acts as a vapor suppressor, so it not only keeps the water out, but also keeps the moisture in.
The good news is that this shouldn’t be a concern if you’ve got a well-ventilated attic. If you don’t have a well-ventilated attic, then that’s just one more reason you are (or will be) dealing with ice dams. If you’re one of the extra-diligent homeowners who requests that your entire roof be covered in ice & water shield, make sure to ask your roofer whether you’ve got adequate ventilation in your attic. You’ll want to avoid high humidity levels that may cause the underside of your roof deck to sweat. If your current ventilation is inadequate, have your roofer install some additional ventilation. It’s usually inexpensive to do so, and worth the little extra trouble.
If there’s good attic ventilation, good exhaust-venting in the kitchen and bathrooms, you’ve sealed any air leaks into your attic, and you’ve covered your entire roof with ice & water shield, then you should have a virtually leak-proof roof.
Of course, you’ll have to be prepared to pay for the extra shielding, but you can recoup the money later. You might contact your home-insurance company prior to the roofing work: Many insurance companies will give you a discount for having a superior level of water protection. That discount may be limited to only a portion of the roof, though. Every insurance company is different, so don’t assume anything and contact your agent.
Does ice and water shield prevent ice dams?
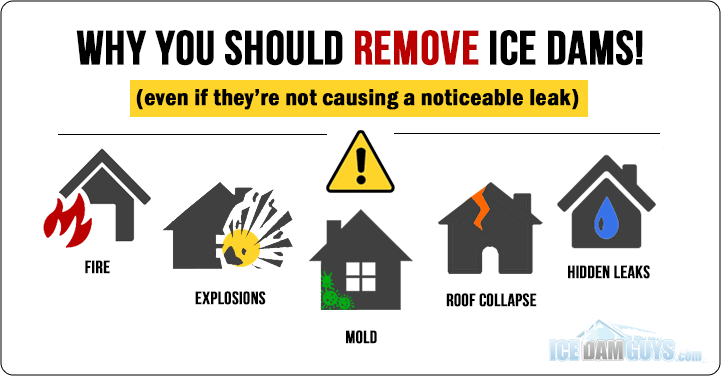
No. Ice & water shield will not prevent ice dams. You’d get it installed simply to minimize the chances of leaks if you do get an ice dam. You should still get an ice dam removed if it’s large enough that you’re concerned that the sheer weight of the ice dam will crush your roof.
Oh, and one thing that my inner Johnnie Cochran snarled at me to mention: Leaks theoretically can still occur even if you’ve got your roof covered in ice & water shield. But especially if you’ve got it covering your whole roof, the odds are minuscule at best.


